The Top DSM Community on the Web

For 1990-1999 Mitsubishi Eclipse, Eagle Talon, Plymouth Laser, and Galant VR-4 Owners. Log in to remove most ads.

Please Support JNZ Tuning
Please Support ExtremePSI

Crash89s Spyder build!

This site may earn a commission from merchant
affiliate links, including eBay, Amazon, and others.

This site may earn a commission from merchant affiliate links, including eBay, Amazon, and others.

Got primer sprayed tonight!!

All taped up
464964[/ATTACH]"]
prime.jpg


Everything cleaned up and in place to spray
464966[/ATTACH]"]
prime2.jpg


First coat!
464968[/ATTACH]"]
prime3.jpg


Buddy got a couple shots of me spraying the second coat.
464970[/ATTACH]"]
prime7.jpg


464972[/ATTACH]"]
prime8.jpg


464974[/ATTACH]"]
prime4.jpg


And finally, a tracer coat.
464976[/ATTACH]"]
prime6.jpg


Guess what I get to do tomorrow!?! Yep, more sanding! Once I sand down a little with 400 on this tracer coat I'll be able to see/make sure the body is straight and see if I missed any small dings! Paint in a couple weeks. After we fix my hood!
 

Attachments

  • prime.jpg
    prime.jpg
    69.3 KB · Views: 37
  • prime2.jpg
    prime2.jpg
    68.1 KB · Views: 36
  • prime4.jpg
    prime4.jpg
    71.2 KB · Views: 37
  • prime8.jpg
    prime8.jpg
    58.5 KB · Views: 37
  • prime7.jpg
    prime7.jpg
    53.1 KB · Views: 33
  • prime3.jpg
    prime3.jpg
    58 KB · Views: 31
  • prime6.jpg
    prime6.jpg
    59.8 KB · Views: 30
sanding YEY!!!!!!!!!!! NOT LOL
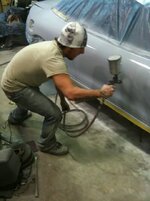
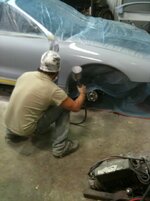
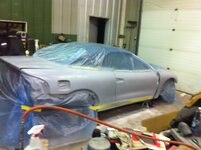
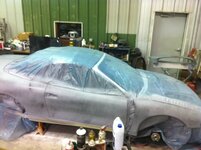
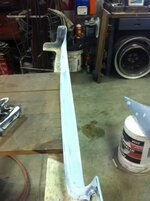
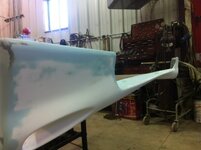
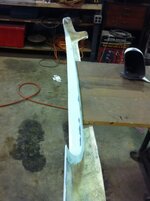
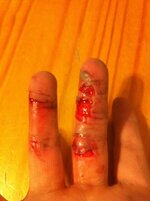
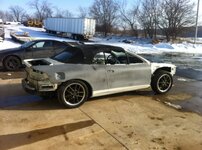
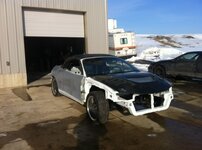
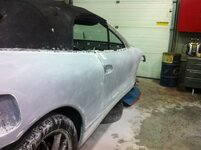
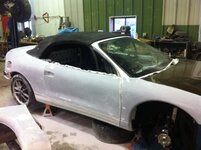
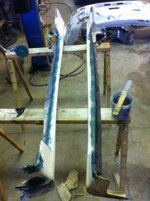
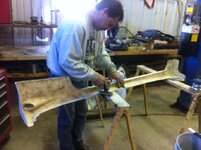
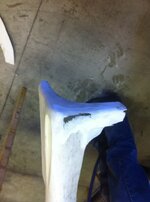
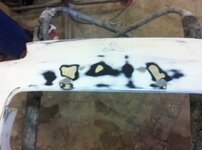
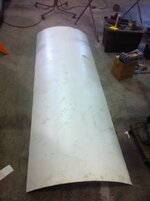
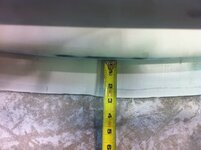
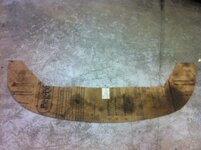
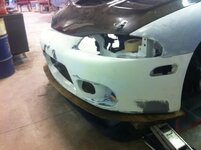
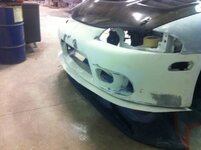
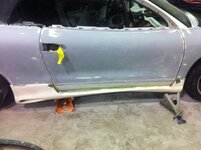
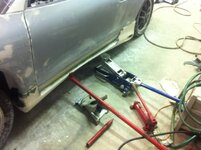
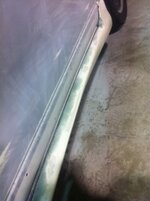
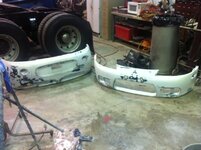
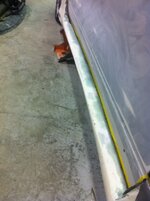
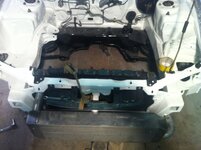
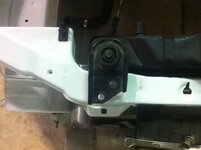
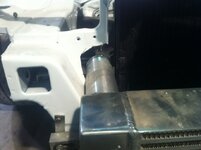
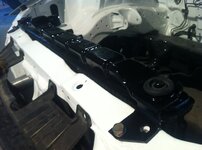
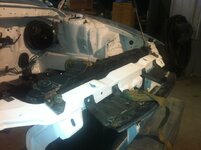
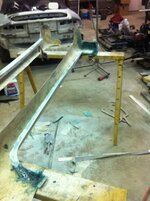
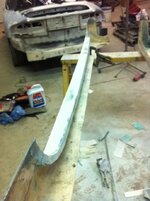
... i love doing body work like cuttin out and replacing sheet metal (i form part with shrinker/stretcher instead of aftermarket patch panels) but man do i hate sanding, probably one of the things i dread most in all aspects of things to dread in life LOL
 
Hey guys, havent really done much to the eclipse since it was primed. But a couple days ago I picked up my windows from the tint guy to have them redone, mine was all peeling and just looked bad.. And I decided to clean up the shop a little bit..

465247[/ATTACH]"]
newtint.jpg


Look whos walking again!! :D
465249[/ATTACH]"]
wheelson2.jpg


465251[/ATTACH]"]
wheelson.jpg


I really need to get my ass in gear and get my hood prepped, Im hoping for paint this weekend. We'll see though.
 

Attachments

  • wheelson.jpg
    wheelson.jpg
    100.6 KB · Views: 32
  • wheelson2.jpg
    wheelson2.jpg
    69.2 KB · Views: 31
  • newtint.jpg
    newtint.jpg
    70.9 KB · Views: 28
The last couple days I 1) started wet sanding the car down again. and 2) started digging into the fuse box wire harness. I didnt get any pictures of the car, but I did of the harness. I deleted anything a/c related and the ABS system and both radiator fans since Im going to wire my new slim fans differently anyways.

What I started with.
465583[/ATTACH]"]
fbharness-1.jpg


Holy ABS wires batman!!
465585[/ATTACH]"]
fbharness2.jpg


All wires eliminated.
465587[/ATTACH]"]
fbharness5.jpg


fuse box.
465589[/ATTACH]"]
fbharness6.jpg
 

Attachments

  • fbharness6.jpg
    fbharness6.jpg
    65 KB · Views: 42
  • fbharness5.jpg
    fbharness5.jpg
    65.6 KB · Views: 41
  • fbharness2.jpg
    fbharness2.jpg
    59.9 KB · Views: 38
  • fbharness-1.jpg
    fbharness-1.jpg
    52.3 KB · Views: 40
Well guys, the body itself is ready for paint!! I need to prep my bumpers and tackle the hood portion. Going to do that tonight. Hopefully paint this weekend!! I know Ive said that like 4 times! LOL

466243[/ATTACH]"]
prime9.jpg


Pics dont do this justice, this thing is so smooth and straight its crazy!
466245[/ATTACH]"]
prime10.jpg


466247[/ATTACH]"]
prime11.jpg


Oh and for kicks I thought Id hit the motor mount with a wire brush!
466249[/ATTACH]"]
motormount.jpg


466251[/ATTACH]"]
motormount2.jpg


466253[/ATTACH]"]
motormount3.jpg


466255[/ATTACH]"]
motormount4.jpg
 

Attachments

  • motormount.jpg
    motormount.jpg
    54.6 KB · Views: 31
  • prime11.jpg
    prime11.jpg
    56.1 KB · Views: 31
  • prime10.jpg
    prime10.jpg
    44.9 KB · Views: 34
  • prime9.jpg
    prime9.jpg
    49.7 KB · Views: 52
  • motormount4.jpg
    motormount4.jpg
    50.7 KB · Views: 34
  • motormount3.jpg
    motormount3.jpg
    55.3 KB · Views: 31
  • motormount2.jpg
    motormount2.jpg
    52.9 KB · Views: 37
Well guys, Im slowly getting progress done. Im getting really tired of sanding this thing and I barely have any finger prints left.. Seriously.. haha. Past couple days Ive been sanding on the bumpers and fixing some cracks and filling holes as well as fixing my aftermarket skirts. They're fiberglass and have looked like ass since I bought them. Pics!

466797[/ATTACH]"]
bumper.jpg


filled license plate holes
466799[/ATTACH]"]
bumper2.jpg


466801[/ATTACH]"]
skirt.jpg


My old man helpin me with some fiberglass work
466803[/ATTACH]"]
skirt2.jpg


Mad a little lip that will hold 2 sided tape to hold the skirt to the rocker
466805[/ATTACH]"]
skirt3.jpg


Then I got thinking, with how low the car is I didnt want to be scuffing up my freshly painted bumper on driveways and such so I thought "what could I do to help avoid this?!" This is what I came up with!

Picked up a big sheet of Kemlite at my local trucking company (ive got an inside pull! :p )
466807[/ATTACH]"]
lip8.jpg


466809[/ATTACH]"]
lip.jpg


466811[/ATTACH]"]
lip4.jpg
 

Attachments

  • bumper.jpg
    bumper.jpg
    60.3 KB · Views: 39
  • skirt3.jpg
    skirt3.jpg
    68.7 KB · Views: 29
  • skirt2.jpg
    skirt2.jpg
    61.5 KB · Views: 34
  • skirt.jpg
    skirt.jpg
    46.9 KB · Views: 29
  • bumper2.jpg
    bumper2.jpg
    51.2 KB · Views: 33
  • lip4.jpg
    lip4.jpg
    60.7 KB · Views: 37
  • lip.jpg
    lip.jpg
    49.4 KB · Views: 38
  • lip8.jpg
    lip8.jpg
    42.7 KB · Views: 38
466813[/ATTACH]"]
lip6.jpg


466815[/ATTACH]"]
lip7.jpg


466817[/ATTACH]"]
lip9.jpg


Now, I know this will not be totally functional like a "real" splitter. This isnt completely finished, Im going to get some kind of turnbuckle for extra support. This is mostly for a little more aggressive look and to protect from messing up my new painted bumper.
466819[/ATTACH]"]
lip12.jpg


Lets hear what you think!!
 

Attachments

  • lip9.jpg
    lip9.jpg
    54.9 KB · Views: 38
  • lip7.jpg
    lip7.jpg
    55.1 KB · Views: 45
  • lip6.jpg
    lip6.jpg
    48 KB · Views: 37
  • lip12.jpg
    lip12.jpg
    44.6 KB · Views: 33
Not knocking your build looks good! U have that stream line car with those ugly hood pins, my opinon. Isnt thier a company that makes lever style hood catches that fit sort of flush with the hood that u just pull a lever on each side. Those would smooth out your hood big time.

Aero hood latches. Sorry cant link.
 
Yea, I know. The hood pins were already on the hood when I bought it. I decided against fixing this hood and am just going to buy a new one. So, once I do that Ill have the opportunity to get new latches.

All those pics and you noticed the hood pins.. LOL! ;)
 
Got some more done fellas.. Finished up the front and rear bumper covers and did some more fiberglass work on the skirts the last couple days. Kind of sucks that fiberglass takes so long to really cure, you cant really make much progress in a day with it.

Bumpers ready for primer
467308[/ATTACH]"]
bumper3.jpg


The passenger side skirt fits like a damn glove!! Driver side on the other hand.. LOL

skirt4.jpg


We wanted to strengthen the lip we made so we laid another good layer on the back side of the old glass, then kind of forced it where we wanted it to be in hopes of when the glass cures itll hold this shape.
467312[/ATTACH]"]
skirt5.jpg


Passenger skirt being held in place as well.
467314[/ATTACH]"]
skirt6.jpg


467316[/ATTACH]"]
skirt7.jpg
 

Attachments

  • skirt6.jpg
    skirt6.jpg
    48.7 KB · Views: 27
  • skirt5.jpg
    skirt5.jpg
    59.3 KB · Views: 28
  • skirt4.jpg
    skirt4.jpg
    46.3 KB · Views: 12
  • bumper3.jpg
    bumper3.jpg
    63.8 KB · Views: 36
  • skirt7.jpg
    skirt7.jpg
    51.3 KB · Views: 29
I Know its been a little while since the last update. Its been kind of slow going to get these side skirts to fit just right. Lay fiberglass just to grind it back off again.. haha!! I also picked up a 1g radiator to accommodate for my RedJack manifold.. Soldered some brass tabs on the bottom and had to fab up my upper mounts because I didnt like how looked all crooked.

468688[/ATTACH]"]
radfit.jpg


Shows how far off the top pins are from the bolt holes.
468690[/ATTACH]"]
radfit2.jpg


With my 2g radiator, I had to kind of dent the side to fit my VRspeed IC. I made the pins on the bottom to fit without any denting!
468692[/ATTACH]"]
radfit3.jpg


Cant really see in the pic, but my hood was hitting on the top of the radiator. Now I also wanted to push the radiator back just a little bit to clear the hood.
468694[/ATTACH]"]
radfit4.jpg


Heres the brackets tacked together.
468696[/ATTACH]"]
radfit6.jpg


Spread some bond-o on them and smoothed them out and painted!!
468698[/ATTACH]"]
radfit7.jpg


My driver side skirt FINALLY fits right.
468700[/ATTACH]"]
skirt8.jpg


Passenger side needs just a liiiiittle bit more
468702[/ATTACH]"]
skirt9.jpg
 

Attachments

  • radfit.jpg
    radfit.jpg
    52.9 KB · Views: 31
  • radfit2.jpg
    radfit2.jpg
    47.6 KB · Views: 31
  • radfit3.jpg
    radfit3.jpg
    46.7 KB · Views: 39
  • radfit7.jpg
    radfit7.jpg
    60 KB · Views: 35
  • radfit6.jpg
    radfit6.jpg
    56 KB · Views: 29
  • radfit4.jpg
    radfit4.jpg
    61 KB · Views: 37
  • skirt9.jpg
    skirt9.jpg
    67 KB · Views: 27
  • skirt8.jpg
    skirt8.jpg
    61.4 KB · Views: 29
Looks good Tom! I wonder where you got the 1g radiator from.... :)
 
well guys its hard to type this update for reasons that will be shown shortly LOL. Primed the car one last time tonight and am sanding it down for the last time this week.. Paint for real on saturday this weekend!!!!!

Well after getting everything all prepped and set up, my old man started spraying the car.. While he was doing that I was setting up a little fan to circulate the air out of the shop.. It was a dual electric fan out of a car using a jump pack to power it.. Well in the midst of things, I got the fan going and propped it between the door and door sill and it slipped and fell toward me. out of reflex I tried to catch it.. BAMM!! Hand in the turning fan blades.. Cut my day short and made a trip to the ER..

On the bright side we did get the car primed after getting back I just forgot to snap some pics.. Weel here we go!!

469033[/ATTACH]"]
primer2.jpg


469035[/ATTACH]"]
primer21.jpg


finished side skirts!!
469037[/ATTACH]"]
primer22.jpg


469039[/ATTACH]"]
primer23.jpg


469041[/ATTACH]"]
primer24.jpg


AAAAND the carnage!
469043[/ATTACH]"]
hand.jpg


Did you know blood is thicker than water? You do now!!
469045[/ATTACH]"]
hand2.jpg


After its been cleaned up and in bandages for 4 hours..
469047[/ATTACH]"]
hand3.jpg
 

Attachments

  • primer2.jpg
    primer2.jpg
    46.2 KB · Views: 31
  • primer23.jpg
    primer23.jpg
    47.9 KB · Views: 34
  • primer22.jpg
    primer22.jpg
    48.8 KB · Views: 42
  • primer21.jpg
    primer21.jpg
    48.9 KB · Views: 28
  • hand2.jpg
    hand2.jpg
    32.7 KB · Views: 30
  • hand.jpg
    hand.jpg
    43.3 KB · Views: 34
  • primer24.jpg
    primer24.jpg
    47.1 KB · Views: 32
  • hand3.jpg
    hand3.jpg
    42.6 KB · Views: 33
Support Vendors who Support the DSM Community
Boosted Fabrication ECM Tuning ExtremePSI Fuel Injector Clinic Innovation Products Jacks Transmissions JNZ Tuning Kiggly Racing Morrison Fabrications MyMitsubishiStore.com RixRacing RockAuto RTM Racing STM Tuned

Latest posts

Build Thread Updates

Vendor Updates

Latest Classifieds

Back
Top