The Top DSM Community on the Web

For 1990-1999 Mitsubishi Eclipse, Eagle Talon, Plymouth Laser, and Galant VR-4 Owners. Log in to remove most ads.

Please Support STM Tuned
Please Support Morrison Fabrication

2G Rear Diffuser Design

This site may earn a commission from merchant
affiliate links, including eBay, Amazon, and others.

This site may earn a commission from merchant affiliate links, including eBay, Amazon, and others.

There are no words or excuses for the amount of delays and distractions that I have willingly and unwillingly put in front of this project, but I can assure you all that it will be finished and not before I am fully satisifed with the workmanship that has been put into its manufacturing.


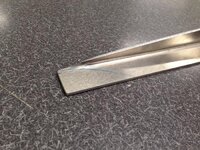
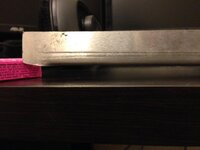
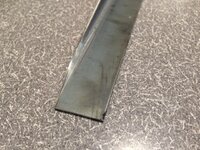
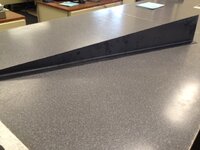
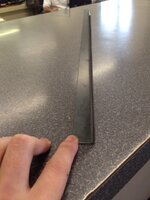
I'd like to bring something into consideration. For the diffuser panel, the big flat part that most people are used to seeing refered to as a diffuser and what most consider the "main" part of this project. It is the easiest to produce and I was about to green light the mold process for it once we got the strakes in, but it came to light that perhaps an easier route would be to make it out of aluminum. Someone asked me, "Why go through the process of fiberglassing it when you could do it out of light metal, and have it all done for you at a shop?"

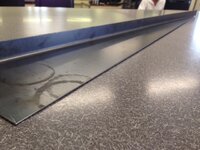
I wanted to say weight, but it hardly would be. I am not against it either way really, and we are still going to use MDF to make our final plug for a fiberglass (which later means carbon fiber) because I think that is an option that some may really want just asthetically. But, it did get me thinking at least.

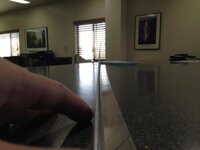
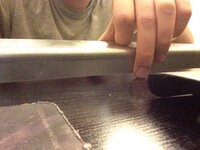
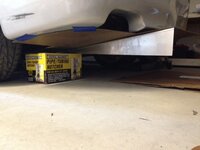
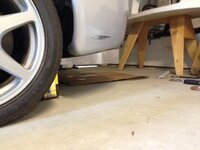
I feel my personal rear diffuser will be made out of metal though, simply because I don't have a rear bumper to mount a fiberglass diffuser to, which I feel would secure the fiberglass much better then a free hanging panel. I dont really know, will have to see the test models and deicde how thick and how well they hold up on their own.

This peice will be 1000 time easier then our sub frame panel to make and will be fun to do, because once we pull a piece from there.. it means we're done! Still waiting on strakes though next week, very anxious to see those.
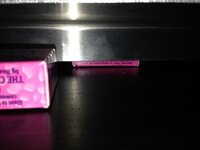
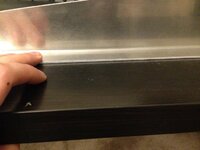
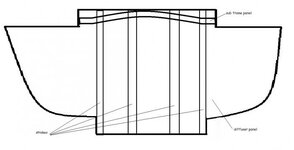
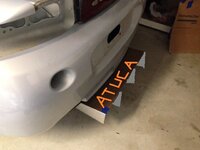
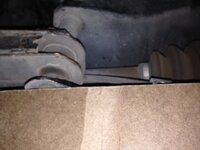
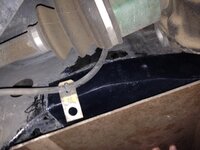
 
What kinda forces will be acting on the diffuser?

If it's made of thin metal, reinforced with strakes/ribs, and perhaps even has few grooves bead-rolled in it, the panel would be sturdy enough to cope with quite alot of force. As far as weight, don't think think it will be an issues when using metal. Another plus of metal is that if somehow a wheel picks up a rock and tosses it at the panel the metal will simply deform (to be straightened later), and not crack like fiberglass.
 
Just got off the phone with metal shop, they had to verify the demensions after the bend as either inner or outer dimensions, but says they are cutting them now. I made sure that the 5 inch height was kept so we conformed to rules after the bend, which they are accounting for the thickness of the metal itself, something I overlooked in my original drawing. He says should be done in a few hours, but I wanted to share anyways! If I grab them today I'll snap a few photos!!
 
Ok, got a call thinking they were done, instead it was to tell me they messed it up. The plasma cutter warped the metal and the strake lip was too thin for their forming machine to bend.

They confirmed with me a few changes to the lip size and will try again tomorrow. Kinda disappointing, but they assured me a refund if they couldn't do it, though if they can't that would put me in a tight spot, lets hope they pull through.
 
Ok, here is a "final" prototype from the metal shop. They said if this don't cut it, they can't do it.

I'll post picture and you can all draw your own conclusions, but the obvious is they are NOT perfect. The reason given to me again, is that the cutting process warps the metal, and then after the bend it gets tweaked even more so. And they said they can not bend the metal to a point, leaving the metal with the weird tip at the end.

To the last point.. it may not be a huge issue, the tip could be cut off by the end user and not placed exactly at the end of the diffuser panel. Since I am going to have the diffuser panel shaped to the sub frame panel (instead of its current straight line face) its quite possible the ends would need to be cut back a little bit anyways.

The warping though may be what makes or breaks this relationship though. The metal can be bent by hand back into shape (flat) but free standing, there is about a 1/4" warp, very visible and apparent.

So the question to be answered: Is this warpage unavoidable by a production metal shop, in the sense I couldn't go to another shop and have them do this with the same laser cut and bend and expect better results.

They are waiting on my call to start the batch of 40+ strakes, so if this one is good by you testers (and others reading) I can get them done or not. I have the proto type they made on hand right now, if anyone wants more pictures, but I took the most exaggerated ones I could to hide nothing. Without super close macro inspection they look fine really, but 1/4" is a 1/4", and I want to be sure that I am not just being too much of a perfectionist; I am new to the metal fabrication world and don't know what to expect.
 

Attachments

  • IMG_3152.jpg
    IMG_3152.jpg
    63 KB · Views: 343
  • IMG_3153.jpg
    IMG_3153.jpg
    73 KB · Views: 320
  • IMG_3154.jpg
    IMG_3154.jpg
    27.6 KB · Views: 227
  • IMG_3155.jpg
    IMG_3155.jpg
    24 KB · Views: 288
  • IMG_3156.jpg
    IMG_3156.jpg
    34.7 KB · Views: 232
  • IMG_3157.jpg
    IMG_3157.jpg
    27.9 KB · Views: 359
  • IMG_3158.JPG
    IMG_3158.JPG
    51.1 KB · Views: 323
Hmm I wonder if shearing it with those industrial machine shears would be better then laser cutting to avoid warping.
 
correction: it was plasma cut, not laser. They said they could laser cut it, but the price would go up, and no guarentee it wouldn't warp. They said this today after it came out warped again from their first attempt. This might fix the issue though if I go laser (or water jet if I could find somewhere?)

And after a quick phone chat with a good friend, I was asked why not just go a thinner steel strake? This keeps the weight issue none existant, it eliminates the warpage issue, its better aerodynamically having the thinner face (by 1/16" or w/e), and it may be cheaper material wise.

It's def something I'll be thinking about tonight, and would love suggestions.
 
Well... If the strakes on the passenger side of the car warped toward the outside of the car and the strakes on the drivers side warped the opposite way, one could argue this could help airflow. Ferrari does this with theirs. I am assuming however, they all warped the same direction which would make this piece not functional at high speeds because it would pull the car slightly to one side...

I would say if it is cheaper to use a thinner material and it avoids the warping issue... why not do that? We aren't really expecting to hit anything with these on and if we do I don't think it would end well either way...
 
Well.. installed into the "counter sunk" holes on the diffuser panel, I'd expect there to be no warp after its installed with a little support against the panel. Like I said i can bend it back with my hands with a little effort, so installed I think we could get it flat, but I believe it be better to have no warp to begin with.

I'll see if they will run me a steel one tomorrow on some thinner stock, and hopefully all will be well.
 
I am having the metal shop run me one last proto type on 16ga mild steel. It's a bit thinner then the aluminum, but not quite half. This hopefully makes it not only stronger, but hopefully for the metal shop means they can do one without warping the strake.

Just as a tease, I snapped a photo of another test fit I did yesterday. I have to make final adjustments to the diffuser panel before we cast one in fiberglass. I am curious what people prefer.

I did a MSpaint image of what it looks like right now under the car. The curved piece has the flat bottom that the diffuser panel mounts to under the rear sub frame. The subframe has this gentle curve and the sub frame panel I made follows this shape. Its great because any air that does end up hitting the panel has a smooth form to go down and around the side of it. However the diffuser panel (right now) has this flat edge lip that mounts to the sub frame panel, and then reaches out near the axel to the sides of the bumper.

The question: Do I leave the diffuser panel as is and have this overlap at the front edge counting on the contour of the sub frame panel to "diffuser" air to the sides, or does having this over hang do nothing more then move the parachute of the rear bumper forward?

Things to note is that the lip would cut into the air stream under the car by about 1/2", this is why I made the subframe panel to begin with, to give the right angle to the rest of the diffuser panel, and to keep air from getting on top of the diffuser. However, at the same time, the panel would only overhang the subframe panel by about 3", and any air caught on top of the panel there would hit the subframe panel and be routed to the sides (into the rear tire wheel wells).

I think the correct route is to cut the panel to fit the shape of the subframe panel, but then there is just one problem... the strakes are all 36" long; with a contoured edge, the strake tip would have to be cut. On one side this also solves the tip being messed up from the metal shop, just cut it off! but.. it would add some variance to the strakes and add an extra step from either me or the installer.

Hopefully the picture illustrates the issue. Curious what people think.

Oh, and the area that will be customized!! The top of the diffuser panel, the part that sticks past the rear bumper, would be the "back" of the panel. The smooth gelcoat side would be facing the ground. The raw fiberglass back would be facing the top, which would be quite an eye sore. Here is where I am proposing a vinyl "sticker" that would just be black, but perhaps this same area would be a place of customization for sponsor names/logos or catch phrases. It will be the next thing I look into out sourcing and see if it is possible to do custom for whatever people wanted there, or just a plain black sticker to cover up the area. I took the liberty of MSpainting on my username, but image it part of a black backing sticker there. Very cool idea I think, but hope to hear your guy's suggestions/solutions for this area.
 

Attachments

  • diffuser panel.jpg
    diffuser panel.jpg
    22.7 KB · Views: 301
  • image2.jpeg
    image2.jpeg
    34.6 KB · Views: 272
  • image1.jpeg
    image1.jpeg
    37.2 KB · Views: 240
  • image3.jpeg
    image3.jpeg
    36.1 KB · Views: 296
Last edited:
In regard to your first question, I think it would be helpful to get a picture underneath the car when you have it mocked up like that so we can see how the air will move into the wheel wells (if at all).

The "back" of the diffuser panel will definitely be an eyesore if it doesn't match well with the bottom. I don't have any experience with vinyl so I don't know quite how that would look/work... I'm assuming the diffuser itself doesn't attach itself to the rear bumper cover in any way. Is there going to be a gap between the two?
 
While nothing is finalized, I would assume it attaches quite a bit to the bumper cover. You can see in my photo I just used some painters tape to hold the panel up for a picture. I'm doing that because drilling holes into the panel means I have to fill them up again when I go to make the mold. I just don't want to make more work for myself then I have to. But it would attach at the subframe panel at the front, and then on the sides and back at the bottom of the bumper cover with screws of some type - little to no gap.


As to how far it sticks out, yes. As seen in the picture, that is pretty spot on exact, about 4-5 inches iirc. That is the distance I had to go to keep the angle right and the strake at its maximum size. There is nothing saying the installer couldn't cut off this extra length, and have it flush with the back of the car, but as designed, this is the longest it can be. I suppose one could argue there is no need to go beyond the back of the car and it's wasted space/weight, but that would have to be tested. I see no harm and if done correctly, will look fine and give some specialized space for logos, names, numbers, and other things of that nature.

*update*

Here are some pictures, the mild steel strakes are much stronger (meaning I can't really bend them now by hand easily) and no more warping!

I also snapped a few of how the diffuser sits against the sub frame panel. Hopefully the pictures speak for themselves. You can see there is overlap, but its pretty minimal and I think doesn't need to be done. This makes the installation of the strakes much easier too as I can use the same for all 4. But, as always this is an openly ever changing project at this stage, so I am open to ideas.

****Do note that there are more holes that need to be put into the sub frame panel for its mounting. This was a quick mock up I did. There will be holes drilled for where the abs sensor wire mount is on the sub frame to hold it from the bottom, and few more where the sway bar mounts go. again, notice the sway bar is not installed, but maybe this weekend I can get the rest of the holes drilled and everything back in place.
 

Attachments

  • ms strake 4.jpeg
    ms strake 4.jpeg
    67.1 KB · Views: 312
  • ms strake 3.jpeg
    ms strake 3.jpeg
    48.5 KB · Views: 212
  • ms strake 2.jpeg
    ms strake 2.jpeg
    47.7 KB · Views: 281
  • ms strake.jpeg
    ms strake.jpeg
    43.3 KB · Views: 303
  • diffuser 9.jpeg
    diffuser 9.jpeg
    32.1 KB · Views: 233
  • diffuser 8.jpeg
    diffuser 8.jpeg
    43.5 KB · Views: 230
  • diffuser 7.jpeg
    diffuser 7.jpeg
    30.5 KB · Views: 646
  • diffuser 6.jpeg
    diffuser 6.jpeg
    34.3 KB · Views: 246
  • diffuser 5.jpeg
    diffuser 5.jpeg
    26.2 KB · Views: 697
  • diffuser 4.jpeg
    diffuser 4.jpeg
    38 KB · Views: 245
  • diffuser 3.jpeg
    diffuser 3.jpeg
    35.3 KB · Views: 226
  • diffuser 2.jpeg
    diffuser 2.jpeg
    25.1 KB · Views: 215
  • diffuser.jpeg
    diffuser.jpeg
    35.5 KB · Views: 229
Last edited:
HMMM I think I do like it. I need to see it in blacked out with a dual tip exhaust back there. Longer than I pictured with less strakes than I imagined. I think it d look better with 2 more fins coming out at the edges to balance it out. but that part doesnt extend. Sort of needs to contour to the rear curve of the bumper. I could see buying one and doing a few alterations. I kind of wanted to see something wider :) More lip at the edges and contoured to the bumper shape.
 
The original design had two more strakes on the side, they would fit. The reason they were removed though is that it will be far more likely people will want to keep their stock routed exhaust. It is just a fact of life that people will not be willing (or able) to reroute it elsewhere.

If two more side strakes were exist, the passenger side would be fine. The driver side however, would be nearly center the small "hole" in the bumber where the exhaust is. Those keeping the exhaust there would almost completely negate that strake, and then to me, it looks off balance having a strake on the passenger side but not the drivers. To put the strake outside the hole would completely mess up the spacing of the other 4, and be right near the middle of the tire, where it would serve no purpose diverting air, AND not to mention the strake would be a different size since it fits between the front and back of the diffuser. There were just too many reasons not to do it, and the only reason for, was to have more strakes to "look" cool.

I made the size of the rear rectangle the way I did as wide as I could to the edge of that exhaust "hole", and then went the same distance to the passenger side. I think one "custom" way to do this would be to fiberglass the hole flush with the rest of the bumper, reroute the exhaust, and have a full flat bottom rear bumper, then have the diffuser maybe with extra strakes and completely unobstructed. Since I am running an AMB aero kit I don't have a rear bumper (really) so I may (likely) will be making another diffuser for my car that will be even bigger and take advantage of the lack of exhaust, spare tire sheet metal, and bumper limitations.

That may also take another year to get around to, who knows, but my point in sharing is I did consider what you suggested, and there is my reasoning. I'm curious if you have any rebuttal though :)
 
I think that looks really good. It is really hard to tell how the air is going to behave around the subframe panel from the pictures but there are ways to test it out.

What angle is this picture in relation to the front/back of the car? Sorry, I can't tell what I am looking at with this one:
attachment.php
 
That is with the camera sitting at the rear exhaust "hole" in the bumper. To the right is the spare tire sheet metal. You are looking at what would be the top of the diffuser panel, with twards the camera the rear of the car, and looking back at the sub frame panel.

*edit* i get it can be hard to see at what angles the images were taken from, but without having a car lift, or removing my rear sub frame, it is rediculously hard to get a "good" photo while laying on my back haha. You can see though that there is a ~1 inch flat area for the panel to mount to that is right at the bottom of the sub frame. It kind of curves to follow the contour of the sub frame panel, and has a bit extra surface area forward to the transfer case, to block air from under the car coming up. You can see in the photos though that on the far left and right edges, there is nothing blocking the air in front of the panel. This is because there was nothing in front to connect to, the axel is there. I was just trying to make the diffuser panel as big as I could without getting in the way of the control arms.
 
Ok I get it.

That area on the drivers side (left side in picture), how do you think air will behave there? Looks like it will come in from there and be on the top side of the diffuser panel to then come out where the exhaust does maybe?

I'd be interested in sticking a go pro in there with string taped on the top of the diffuser panel to see where the air goes.

Or will that part be more sealed and isn't quite done yet in this pic?
 
No this is pretty much what you see waht you get at this point, so lets fix anything you see wrong now :D

Here in this picture:

You must be logged in to view this image or video.


This is looking from the front of the car back. See the left side of the picture, the front of the sub frame panel on this side is lower. My sub frame panel (dark black in ths picture) comes from the back side of the sub frame, wraps under it giving the diffuser panel a place to connect, and then comes up here blocking air. The xfer case would be to the right in this photo, just for reference. There would be a VERY small space for air to leak in at the change of heigh in the sub frame panel, that would just have been too hard to completely 100% air tight seal. I think that small gap is much better then parachute bumper though.

You must be logged in to view this image or video.


In this photo, the back of the sub frame is to the right, and front is to the left. See how it wraps under the opening in the sub frame and gives somewhere for the diffuser to mount? The diffuser panel is hanging low here (I wasn't holding it up so there is a 3 inch gap there) but you can see where it would touch when bolted. Again on the left side, you can see the metal sub frame is bent down there, while the back is tucked up. I believe the part down is a control arm, I'd have to check again, but its not symetrical front and back. The nut on the right side is the lower hole where the rear sway bar bracket connects to the sub frame. I am using it to bolt the sub frame panel to the sub frame.

I think I did a pretty good job making the sub frame panel sealing air from under the car. The opening that still exists though would more likely attract air from the wheel wells, and at that point.. it would take a go pro and yarn to see what happens there. To make a completelty sealed area there with wheel well blockers of some sort would just be too much of a project to add to an already vastly delayed project.

Your testing would provide if they are needed anyways though, right? :p
 

Attachments

  • diffuser edited.jpg
    diffuser edited.jpg
    34.1 KB · Views: 156
That all looks great to me. I circled the part that is confusing me in the pic. If that pic is from the back of the car looking forward, would a ton of air not be getting in where I circled or am I just blind/retarded and not getting what you are saying?

You must be logged in to view this image or video.
 
Here is a better picture

80% of that space is blocked by the stock wheel well plastic. A better solution is a custom wheel well piece that provides more mounting space at the bottom for the diffuser panel, but, hope this clarifies.

It's not perfect, maybe I could even have the subframe panel also connect at the wheel wells? No wait.. the sway bar has to fit in that hole. I knew there was a reason I didn't do that. It is impossible to be perfect here, but gotta find the best solutions to what we can right?
 

Attachments

  • image (2).jpg
    image (2).jpg
    21.3 KB · Views: 302
  • image.jpg
    image.jpg
    42.7 KB · Views: 248
Wow, that is not bad at all.

Not that I had any doubts but I think you are going to get some good results with this. I like what you did with the strakes as well for us "stock routed exhaust" people. I really don't think strakes behind the wheel wells would have been necessary at all without some serious wind tunnel time to see exactly how to do it.
 
Good job! I'm eager to see the more aggressive version for us guys with no spare tire well.
 
Yea.. as you can see in a picture of Andrew's car with the kit.. I'll have to get creative with another diffuser version and mounting, there isn't a bumper to connect to anymore!
 

Attachments

  • 482867_277554425710530_43024843_n.jpg
    482867_277554425710530_43024843_n.jpg
    44.9 KB · Views: 310
Support Vendors who Support the DSM Community
Boosted Fabrication ECM Tuning ExtremePSI Fuel Injector Clinic Innovation Products Jacks Transmissions JNZ Tuning Kiggly Racing Morrison Fabrications MyMitsubishiStore.com RixRacing RockAuto RTM Racing STM Tuned

Latest posts

Build Thread Updates

Vendor Updates

Latest Classifieds

Back
Top